A little tuning is required before the interpreter is actually
usable, and this post serves the purpose of collecting all the necessary
steps in one place.
After installing the interpreter with pkg_add apl (which automatically installs the fonts),
we need to enable the UTF-8 character encoding in the locale; I added the following lines to
my .profile file:
We need to do the same for X, and at the same time we must specify which font
set we want to use; I have the following lines in my .Xdefaults,
the latter of which is one of the two fonts that the apl-fonts
package installed in /usr/local/share/fonts/apl:
  XTerm*locale:utf8
  xterm*faceName:APL385
The above steps are enough to ensure that the system displays APL symbols
correctly. To verify that everything works correctly, the file
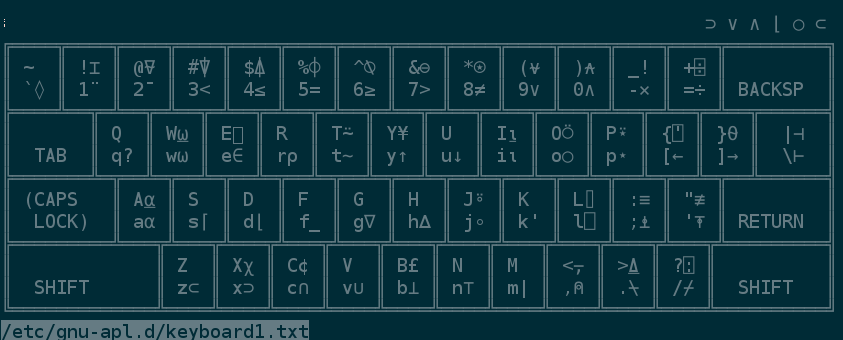
/etc/gnu-apl.d/keyboard1.txt must show something like this:
The picture shown provides us with a good starting point
for the keyboard layout; as better explained in the documentation, there are
many ways to configure the keyboard for APL symbols, either system
wide or circumscribed to the APL interpreter only. My personal preference
is to dedicate ten minutes to writing a custom .XCompose that
would spatially map the APL symbols exactly as shown in the picture to
the keyboard regardless of whatever layout the latter has. This approach
has the benefit of letting us use keyboard1.txt as a quick
mnemonic reference as it is (it works great in a tmux pane, for the
ultimate IDE experience).
There are better news for the lazy: someone else already compiled the
.XCompose
for you. So what is left is to define the compose key in .xinitrc,
in my case it's the right control key, to avoid clashing with tmux and cwm control keys:
setxkbmap -option compose:rctrl
We are now able to use the best programming language on the best operating system
with no clutter.